Pairing Ancient Tomb with Chalice of the Void is a tale as old as Mirrodin. In Legacy, these decks always struggled a bit to find the right way to follow up that start effectively. That all changed with the printing of the Eldrazi in Oath of the Gatewatch. With their relatively low casting cost and high power and toughness, they have had a lasting effect on the Legacy format since then. Pairing perfectly with lands that tap for two mana, they have made up the core of Legacy’s most potent Stompy deck. Today I want to take a look at a list played to a Top 8 finish in the Magic Online Showcase Challenge by user Mei0024 and break down what makes this such an intimidating strategy.

Legacy Eldrazi
Creature (24)
Instant (4)
Land (27)
Core Game Plan
The strategy of Stompy decks is relatively straightforward: use lands that tap for two mana to cast early lock pieces and back that up with powerful creatures that are played ahead of schedule as a result of the same lands. The Eldrazi this deck plays are all incredibly potent when played a turn or two before they were intended to be cast, and this puts the opponent very far behind on board. As a result of their size and mana cost, most of them dodge a lot of commonly played removal, which means that most opponents won’t have the necessary time to answer the pressure you’re presenting.
Here’s a look at the specifics of Mei0024’s list – why is it so effective?
Card Choices
[su_heading size=”14″ margin=”1″]4 Eldrazi Mimic, 4 Matter Reshaper[/su_heading]
These are the cheap creatures that let you have an aggressive curve. With 12 lands that tap for two mana, Eldrazi Mimic functions more like a one-drop. With an Eye of Ugin in play you can generate even more mana advantage and play out two or more of them on the first turn. With the relative size of the other Eldrazi in the deck, as early as turn two Mimic can be attacking for 3 or even 4 damage, which is a lot for a “one-drop”.
Matter Reshaper, on the other hand, is just a solid body that generates card advantage when it dies. It most commonly functions as a two-drop, and in the face of most creatures it can just attack or block freely while generating an advantage. While it dies to most removal spells in Legacy, the fact that it always draws a card (except against Swords to Plowshares) and, occasionally, puts a free spell into play from the top of your library makes it really annoying to interact with.
[su_heading size=”14″ margin=”1″]4 Thought-Knot Seer, 4 Reality Smasher[/su_heading]
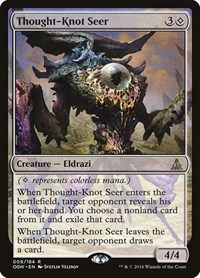
These are the payoff creatures, and the primary reason Eldrazi has been a powerful force in Legacy since its inception. These two creatures have worked in tandem since they were printed to close the door on opponents very quickly and disrupt them along the way. Casting a Thought-Knot Seer ahead of schedule, which can be as early as turn two in this deck, is effective against every deck. It dodges the most commonly played removal, attacks for a fair amount of damage, and can strip their hand of the best card.
Reality Smasher might not take their best card from them, but it hits so hard that a lot of opponents won’t have the time to use their most powerful cards. There are very few creatures in Legacy that can effectively block a Smasher and the damage output it represents is completely game changing.
[su_heading size=”14″ margin=”1″]4 Endless One[/su_heading]
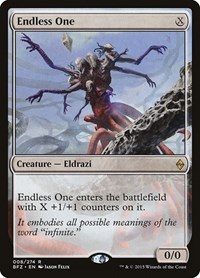
Endless One is the most versatile creature in the deck and it fills any gap in the curve. Sometimes this deck just needs to play a 2/2 on turn one to start applying pressure. The fact that it can be a 4/4 on turn to follow up a Mimic, or even larger later makes it one of the staple creatures of this deck.
[su_heading size=”14″ margin=”1″]4 Eldrazi Displacer[/su_heading]
One of the benefits of adding white to the deck is getting to run Eldrazi Displacer. This card has a ton of utility and can make life difficult for anyone trying to play with creatures and removal. It stops Emrakul in its tracks, clears out blockers for planeswalkers, retriggers Thought-Knot Seer, and so much more. The cost of adding white to the deck can be high, but oftentimes it will be worth it for what Displacer adds.
[su_heading size=”14″ margin=”1″]4 Thorn of Amethyst[/su_heading]
This is an uncommon inclusion in the main deck, and this space is usually dedicated to Chalice of the Void, but it makes a lot of sense in the metagame right now. A lot of decks play Oko and don’t tend to fold to a single Chalice in the same way they used to. Thorn doesn’t end the game in the same way that Chalice does, but it still slows down the development of most decks, as well as substantially slowing down Oko. This deck is extremely aggressive, which means that slowing down opponents by a turn or two is often enough time to get the game over with.
In addition, since this deck isn’t playing Chalice in the main deck, and is playing white for Displacer, that also opens the door to play Swords to Plowshares, which really helps against Delver decks at the moment.
[su_heading size=”14″ margin=”1″]4 Swords to Plowshares[/su_heading]
Another benefit of adding white, Swords to Plowshares is the most efficient removal spell around. It answers just about every creature you need to, and the drawback of them gaining life isn’t a huge deal since this deck tends to attack for large amounts.
[su_heading size=”14″ margin=”1″]1 Lotus Petal[/su_heading]
Most Eldrazi decks tend to play multiple copies of Simian Spirit Guide instead of Lotus Petal. The acceleration is nice, but this deck doesn’t have a lot of excess space to fit in multiple copies of that type of effect. Since this deck is running Eldrazi Displacer, it also has a higher emphasis on mana sources that stick around, so there is a real cost to trimming lands for one-shot acceleration.
[su_heading size=”14″ margin=”1″]4 Ancient Tomb, 0 City of Traitors[/su_heading]
Lands that tap for two mana are huge in this deck, and Ancient Tomb is the best of them. Being able to cast any Eldrazi a whole turn ahead of schedule, as well as cast Thorn or Chalice on turn one, makes Ancient Tomb a key to the deck. The drawback of taking 2 damage is greatly mitigated by the fact that this deck is so aggressive, thus putting opponents on the back foot a lot of the time.
While City of Traitors is powerful, it is not a mana source that sticks around. Much like Lotus Petal, this deck really needs its mana sources to stay in play, and City of Traitors doesn’t let you develop your mana base in the same way as Ancient Tomb.
[su_heading size=”14″ margin=”1″]4 Eldrazi Temple, 4 Eye of Ugin[/su_heading]
A lot of what is true about Ancient Tomb is true for this set of lands. These don’t cast Thorn on turn one, but they still let you ramp out your creatures with ease. Eldrazi Temple lets you activate Eldrazi Displacer, as well as actually tap to play non-creature spells later in the game. While Eye of Ugin doesn’t actually tap for mana, it gives you the option of casting multiple Eldrazi in the same turn, thus generating more than two mana in some cases. Eye of Ugin also has a very relevant ability in the late game, as searching up a Reality Smasher every other turn can really close the door on slower decks.
[su_heading size=”14″ margin=”1″]4 Cavern of Souls[/su_heading]
The bane of blue players everywhere, Cavern of Souls can completely cut off an opponent’s ability to interact with you and is one of the best lands in the deck for that reason.
[su_heading size=”14″ margin=”1″]2 Wasteland[/su_heading]
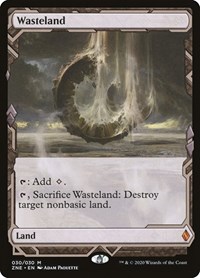
Most colorless Eldrazi decks tend to play four Wasteland, but it’s more difficult to fit those into this deck. Between actually wanting mana sources in play for Eldrazi Displacer and needing to find space for more colored mana, Wasteland is a bit worse in this version of the deck. That being said, it is still a powerful disruptive tool and having a pair here can go a long way.
[su_heading size=”14″ margin=”1″]3 Shefet Dunes, 3 Snow-Covered Plains, 2 Karakas[/su_heading]
These are the white sources that enable the splash. Shefet Dunes is a white/color dual land, which can be a big game in this deck. The cost of paying one life for white mana is relatively low, but it is still a cost, so running the full set can be difficult. Basics are king in Legacy and running three here is really nice. Back to Basics is one of the most obnoxious cards for Eldrazi to deal with and having three plains minimizes its impact substantially. Karakas is legendary, so sometimes drawing multiples can be annoying, but having the utility to interact with Uro, Emrakul, and Griselbrand gives this deck a lot more value out of its land slots.
[su_heading size=”14″ margin=”1″]1 Urborg, Tomb of Yawgmoth[/su_heading]
This is mostly to pair with Eye of Ugin to turn it into a tri-land. It has some additional utility of making Ancient Tomb tap for mana but not deal you damage, which is definitely some nice upside.
Sideboard
[su_heading size=”14″ margin=”1″]1 Lotus Petal[/su_heading]
Sometimes acceleration is more important than card advantage so using a card to play your cards ahead of schedule can be important.
[su_heading size=”14″ margin=”1″]4 Chalice of the Void[/su_heading]
Chalice is still an unbelievably good lock piece, so bringing it in against the right decks will still yield a fair amount of turn-one victories.
[su_heading size=”14″ margin=”1″]4 Leyline of the Void[/su_heading]
Graveyard decks are some of the most difficult matchups for this deck. Leyline is the best haymaker in the game against those decks and it really swings the matchup in Eldrazi’s favor post-board.
[su_heading size=”14″ margin=”1″]2 Oblivion Ring[/su_heading]
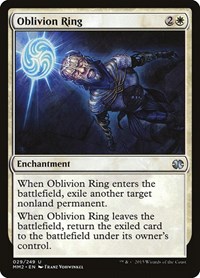
A way to remove Oko and answer any pesky cards put into play off of Show and Tell, Oblivion Ring is a very versatile card in Legacy.
[su_heading size=”14″ margin=”1″]1 Path to Exile[/su_heading]
Sometimes four Swords to Plowshares aren’t enough so Path to Exile can fill the role of a fifth copy in the sideboard. Sometimes it’s worse, and giving them a land can be backbreaking, but some decks don’t play basics (looking at you, RUG Delver), so Path has the opportunity to be better than Swords in that context.
[su_heading size=”14″ margin=”1″]2 Sorcerous Spyglass[/su_heading]
Stopping cards like Sneak Attack and Thespian’s Stage can all be important in this deck, so the versatility that the Spyglass provides can be really nice to have access to.
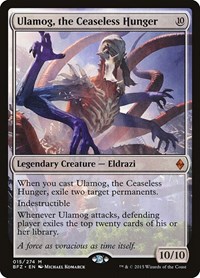
[su_heading size=”14″ margin=”1″]1 Ulamog, the Ceaseless Hunger[/su_heading]
This is a way to beat slower decks, like Miracles and Snow, by bringing in a tutor target for Eye of Ugin to get that will just end the game in most cases, or just generate a ton of value.
Tips and Tricks
- Eldrazi Temple can be used to activate Eldrazi Displacer’s ability, which will save you some life over using Ancient Tomb.
- If you have an Eye of Ugin and Cavern of Souls in play, you cannot make Matter Reshaper uncounterable.
- When in doubt, lead on Thorn of Amethyst or Chalice over Mimic. Slowing opponents down is more important than starting on pressure in most matchups.
Sideboard & Matchup Guide
[su_highlight background=”#ff99a6″]Out: 4 Reality Smasher, 4 Matter Reshaper, 1 Endless One[/su_highlight]
[su_highlight background=”#a7ff99″]In: 4 Chalice of the Void, 4 Leyline of the Void, 1 Lotus Petal[/su_highlight]
This matchup can be scary, but there are a ton of hate pieces in the sideboard to help there. Karakas is a really important card, as it will really help prevent you from losing to an early creature. I’m suggesting cutting the Smashers, even though they can close the door really quickly, because your opponent can Unmask you and Reanimate it if you start on a Leyline, which could be a real problem.
[su_highlight background=”#ff99a6″]Out: 4 Matter Reshaper, 4 Swords to Plowshares, 1 Endless One[/su_highlight]
[su_highlight background=”#a7ff99″]In: 4 Chalice of the Void, 2 Sorcerous Spyglass, 2 Oblivion Ring, 1 Lotus Petal[/su_highlight]
Pre-board, if you can’t kill them fast enough the only way to stop them from killing you is to rely on Karakas. In general, it’s more important to slow them down then try to kill them, so look for hands with lock pieces. Thought-Knot Seer plus Cavern of Souls is a really effective way to disrupt them, as well. If you have any semblance of an aggressive draw and can back it up with an Oblivion Ring (to put in off of Show and Tell) or Karakas, you can often end the game pretty quickly.
[su_highlight background=”#ff99a6″]Out: (on the play) 4 Swords to Plowshares, (on the draw) 4 Thorn of Amethyst, 2 Matter Reshaper[/su_highlight]
[su_highlight background=”#a7ff99″]In: 4 Chalice of the Void, (on the draw) 1 Lotus Petal, 1 Path to Exile[/su_highlight]
I know my sideboard plan for this matchup is a bit odd as I’m suggesting cutting removal against Delver, but I think that on the play the most aggressive strategy is likely the most effective. Resolving a turn one Chalice or Thorn on the play is often good enough to buy a lot of time, but on the draw it might be a bit too slow. There’s a lot of tension with Swords to Plowshares and Chalice, so it might just be correct to not sideboard at all on the draw (meaning that Thorn might be better), but Chalice is so potent in a lot of games that I think it’s still better. Matter Reshaper is mostly just a curve filler and doesn’t do much against their best cards against you (Delver, Tarmogoyf, Oko) so I think it’s fine to cut here on the draw.
[su_highlight background=”#ff99a6″]Out: 4 Swords to Plowshares, 1 Lotus Petal[/su_highlight]
[su_highlight background=”#a7ff99″]In: 4 Chalice of the Void, 1 Ulamog, the Ceaseless Hunger[/su_highlight]
Eye of Ugin is arguably the best tool in the deck, since it will let you take over the late game if unchecked. Post-board, the single Ulamog is the best tutor target and it often ends the game on the spot. Chalice isn’t an all-star in this matchup because of cards like Oko and Abrupt Decay, but the idea is to use it as a speed bump. Cavern of Souls is incredible, and Smasher is one of the best threats here.
[su_highlight background=”#ff99a6″]Out: 4 Matter Reshaper, 4 Thorn of Amethyst, 1 Swords to Plowshares[/su_highlight]
[su_highlight background=”#a7ff99″]In: 4 Leyline of the Void, 4 Chalice of the Void, 1 Lotus Petal[/su_highlight]
I think this matchup is pretty high variance. If you have a Leyline post-board and they don’t have the Force of Vigor, it is relatively straightforward to win from there with most draws. If they do, then they can flood the board and relatively easily set up a combo kill, since you don’t have any other meaningful interaction. It’s worth mulliganing low to find a Leyline, as it is really important to have in the matchup, but keep in mind that it might not be enough.


